Make sure your system is up–to–date
Be sure that you run Windows Update before setting up your VPN connection.
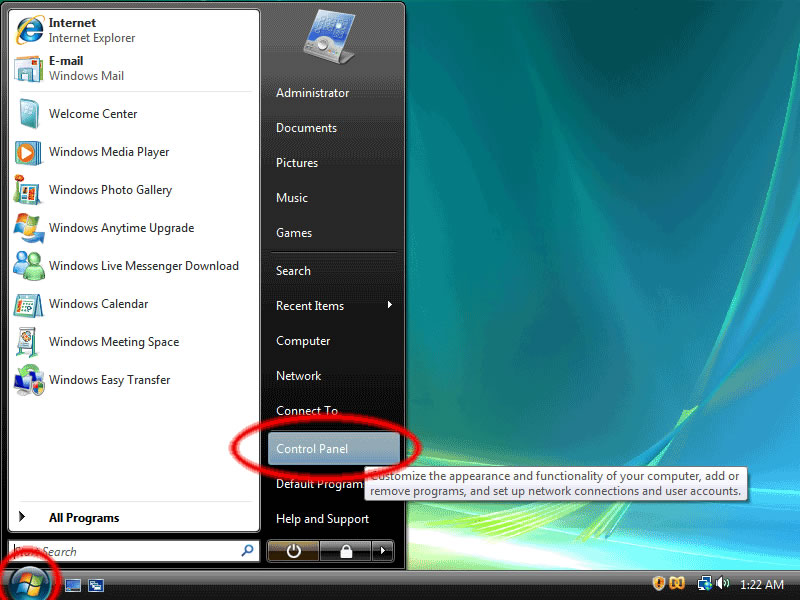
Open the Control Panels
First, click on the Start button and click “Control Panels”. This opens up the “Control Panel Home.”
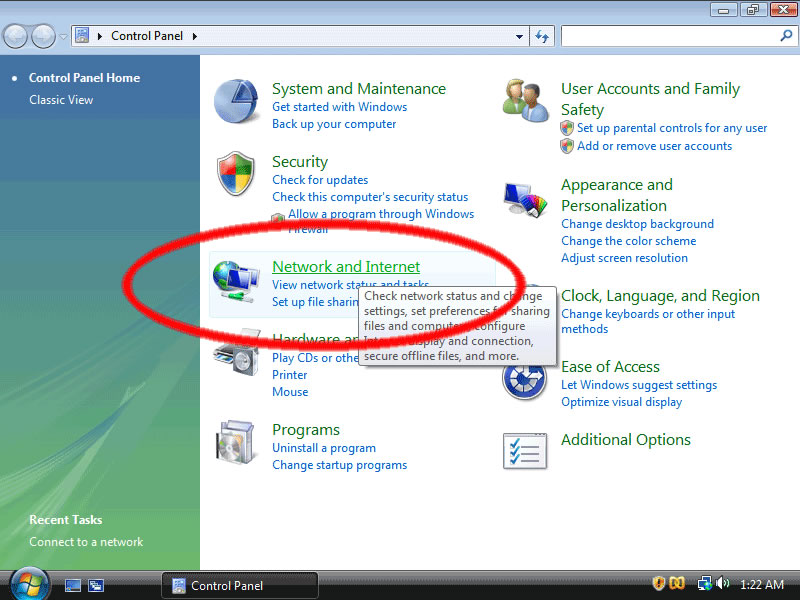
Go to the “Network and Internet” panel
Next, click on the “Network and Internet” control panel, which is circled in red below.
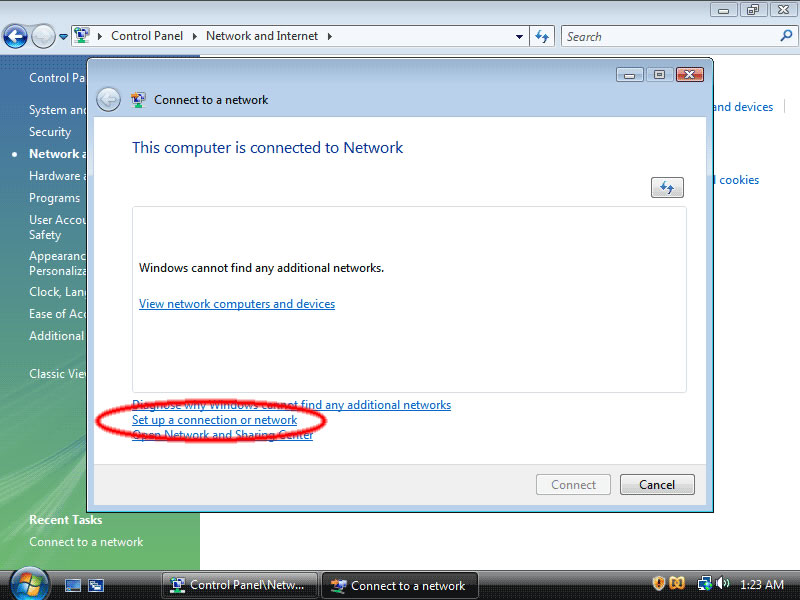
Connect To A Network
Next, click on “Connect to a network.”

Set up the VPN connection
The next screen may not look quite like this if you have networks already defined. In any case, click on “Set up a connection or Network.”
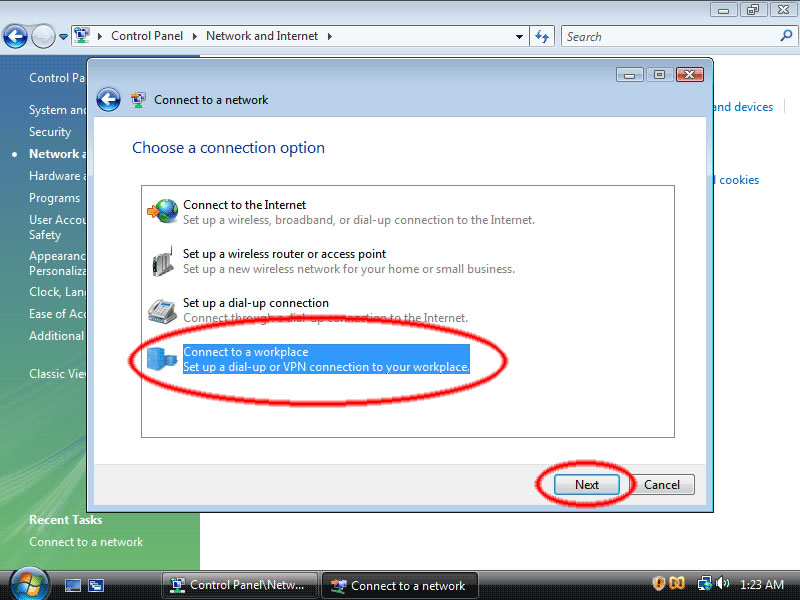
Choose the Connection Type
On the next screen, click on “Connect to a workplace” then click “Next.”
Select the Internet connection
Next click “Use my Internet connection (VPN).”

Enter the server information
Now, enter the server details.
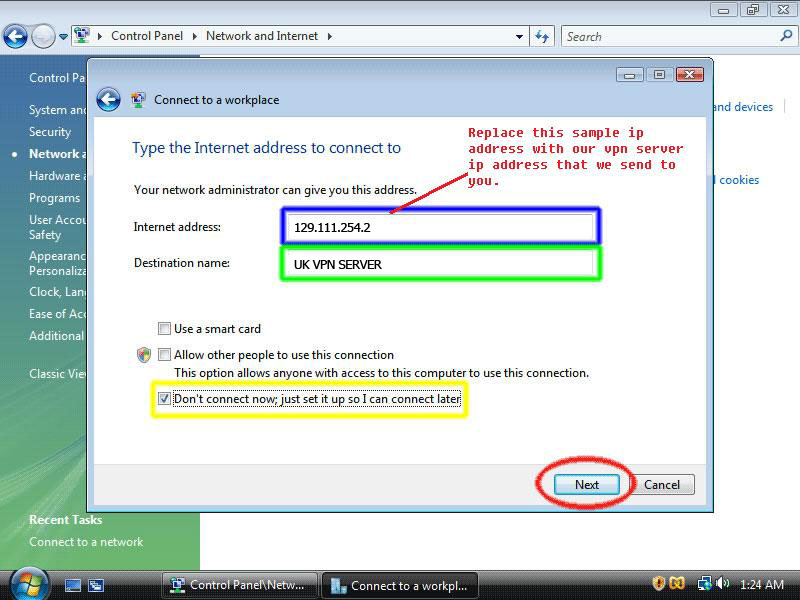
In the text box labelled ‘Internet address’ (blue) type the server address that we sent you, the server address will either be in the form of a named server address for example pptp.mysetup.co.uk or a standard numerical IP address, this information can be found in your welcome email or via your account online in my subscriptions under view log in info.
In the text box labelled ‘Destination name’ (green) type ‘UK VPN SERVER’. This is the name of the connection, and will show up in the “Connect to a network” screen when we’re done.
Lastly, make sure that the checkbox labelled “Don't connect now; just set it up so I can connect later” (yellow) is checked.
Then click the “Next” button.
Enter your username and password
In this screen, enter your username and password.
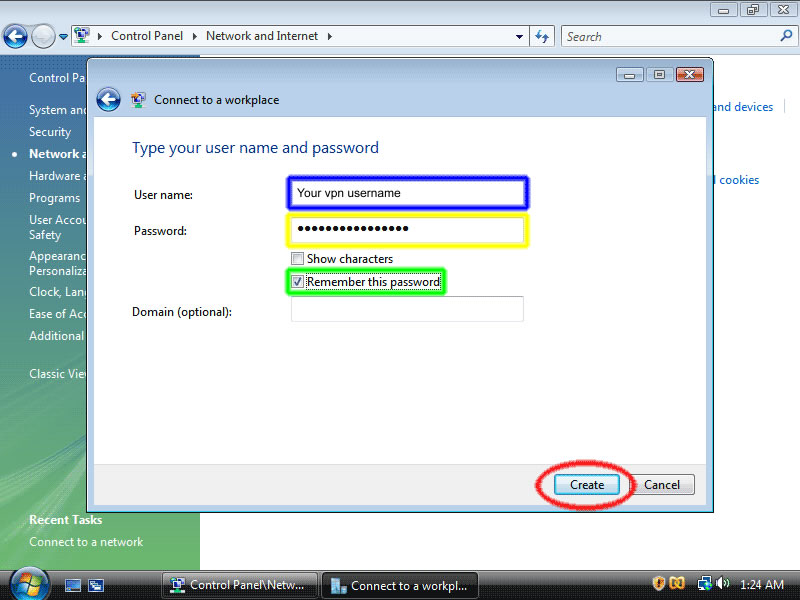
In the text box labelled “User name:” (blue), enter your username.
In the text box labelled “Password:” (yellow), enter your password.
Optionally, check the “Remember this password” checkbox (green) and you won’t have to enter your password when you connect to your VPN.
Then, click the ”Create” button.
Connection Ready
You should see this screen next. Click the “Close” button to return to the “Network and Internet” screen.

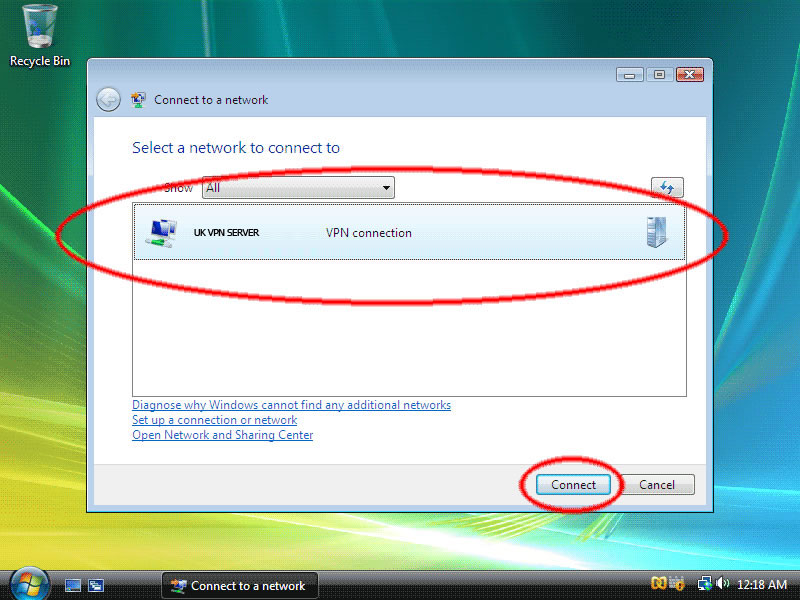
Go to the connection
Now click on “Connect to a network” again.
Then click on the UK VPN SERVER entry and click “Connect”.
This will setup an automatic VPN connection. Some ISPs will not allow you to connect using an automatic connection. If this happens please follow these additional steps to connect using IPSec:
1. Open "Control Panel" then "Network and Sharing Centre then click "Manage Network Connections" from the left hand side.
2. Right click on your new Virtual Private Network connection and select properties.
3. Select the 'Networking' tab.
4. From the fall-down menu 'Type of VPN' instead of 'Automatic' select 'L2TP IPsec VPN'.
5. Click the 'Security' tab.
6. Ensure the Security options are set to Typical (recommended settings). Place a tick in the 'Require data encryption' box then click the 'IPsec Settings' button.
7. Select the checkbox on "Use pre-shared key for authentication" and type 953783903. Click 'OK'.
8. Connect to the VPN server
9. To disconnect from a VPN connection, right-click the icon for the connection, and then click “Disconnect”
Greg
Comments