Please download the Windows software, you can do this by clicking here.
Click "Download for Windows" and once downloaded please click run or open.
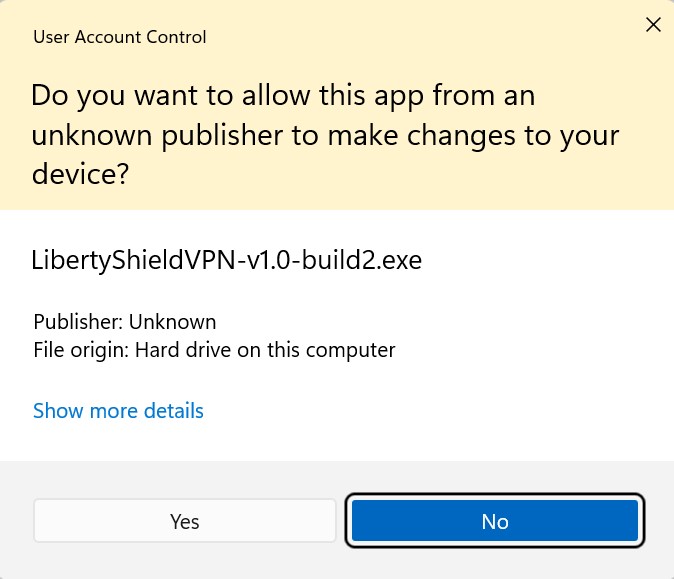
Step 1: Click Yes to continue
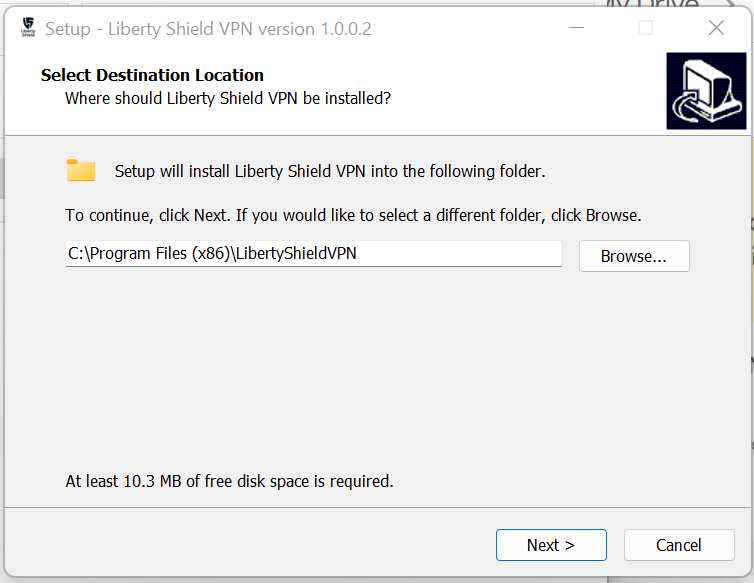
Step 2: Click Next to continue
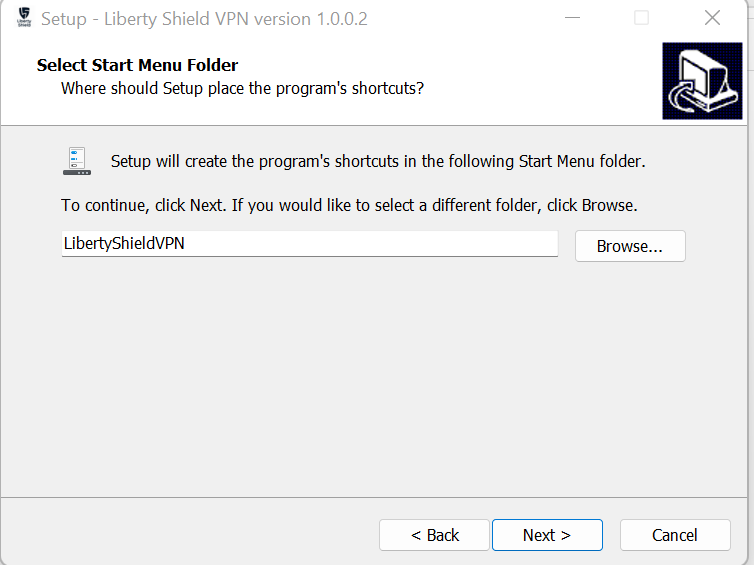
Step 3: Click Next to continue
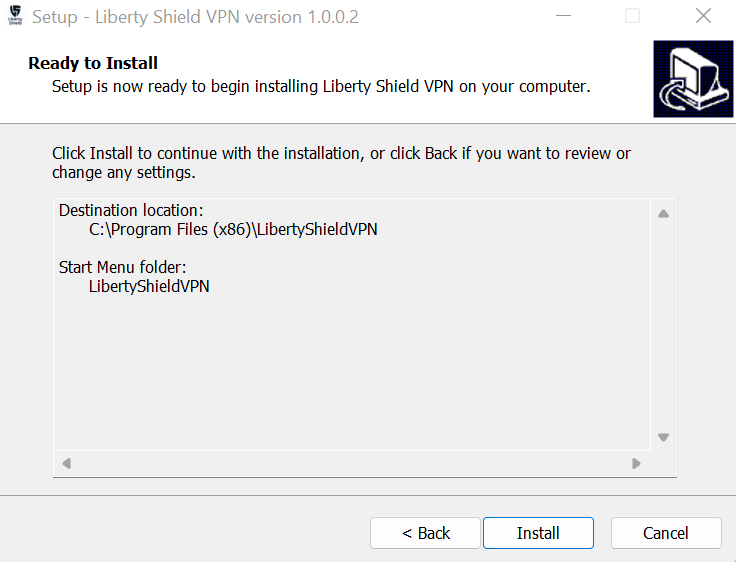
Step 4: Click Install
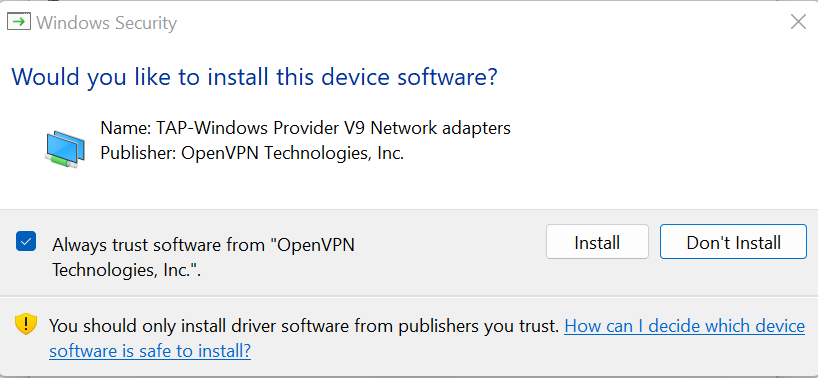
Step 5: You may get this popup if your security setting require that you allow the app installation - click Install to continue
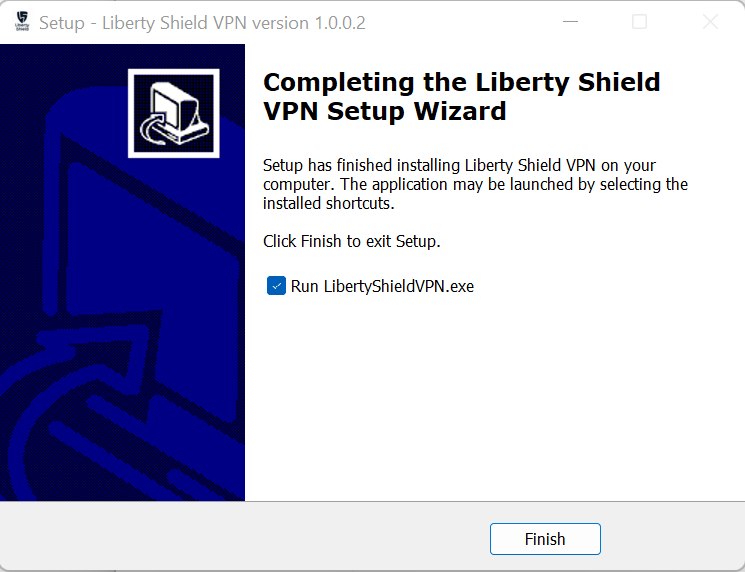
Step 6: Tick the box to run the VPN app then Click Finish
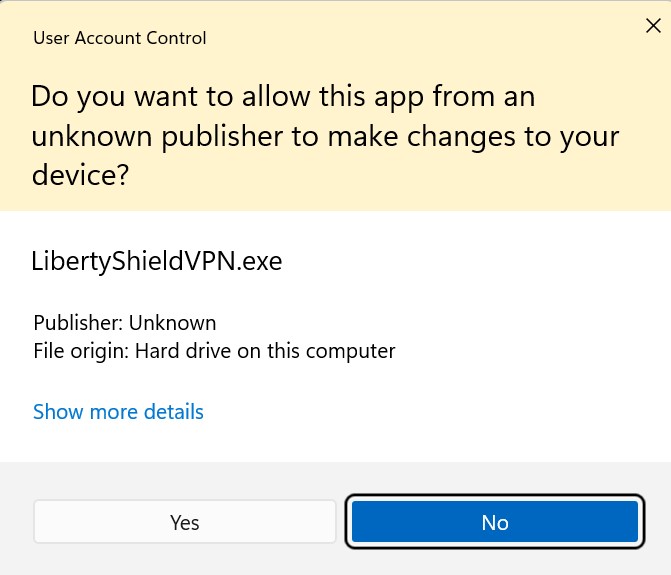
Step 7: When opening the app you will be prompted to allow the app to run, click "Yes" to continue
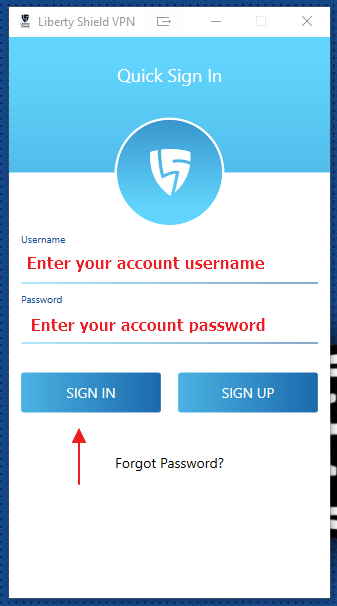
Step 8: Now enter your Liberty Shield username and password and click sign in.
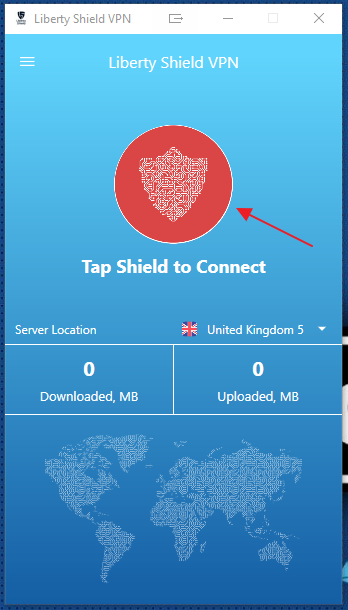
Step 9: Now click the red shield to connect.
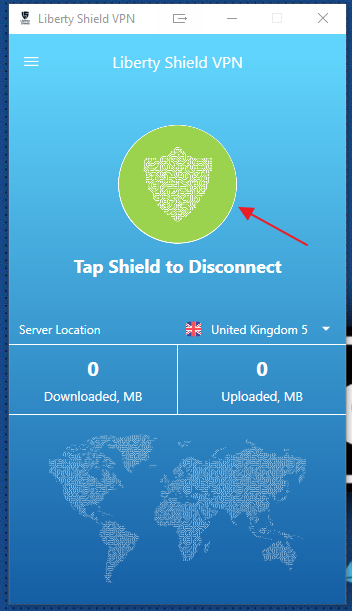
Step 10: You will now see the shield turns green, you are now connected. If you wish to disconnect simply click on the green shield this will change from the green shield to the red shield, which shows that your VPN is then not connected.
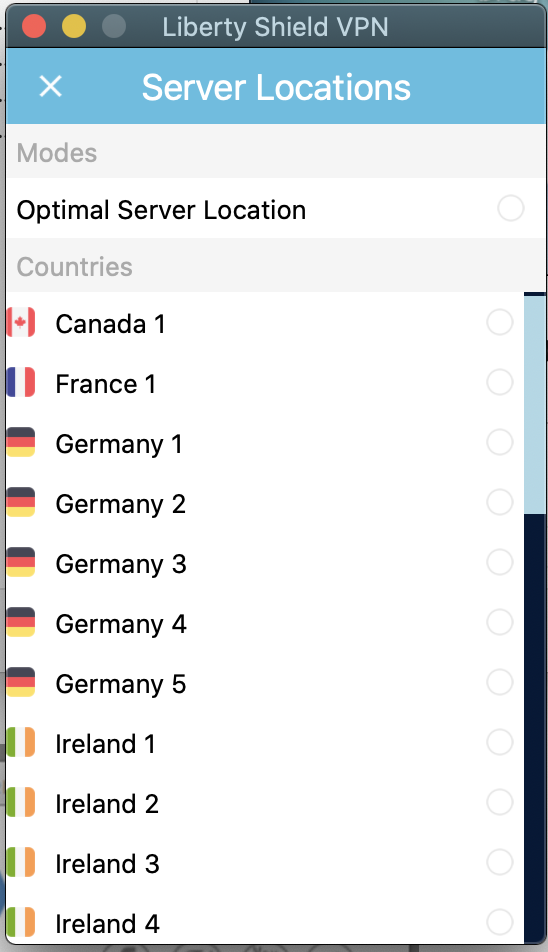
Step 11: If you wish to change your VPN location click on the countries flag on the main app window you will see the menu below where you can select a VPN for the country you wish to use, from our available servers.
Please Note: If you wish to change the server or VPN country you MUST disconnect before making any changes, then once changed you can reconnect.
The optimal server location option is still under development and is currently not available at this time, simply select the relevant VPN country you require and select one of the countries servers.
Opening the app
The LibertyShield VPN app icon will now appear on your PC/Laptop desktop. The app is now installed on your machine, so to open the app double click the icon and then follow from step 7 above.
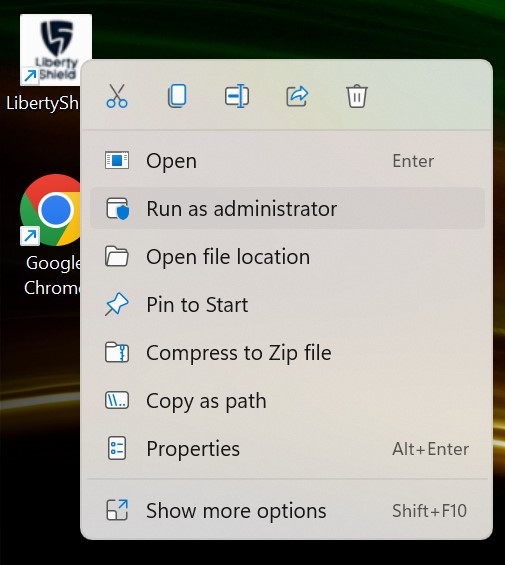
If you have any issues opening the app, then right click on the LibertyShield VPN desktop icon per image below and select "Run as administrator" then follow from step 7 above.

Stephen
Comments